 Mega Furniture Pte. Ltd.")
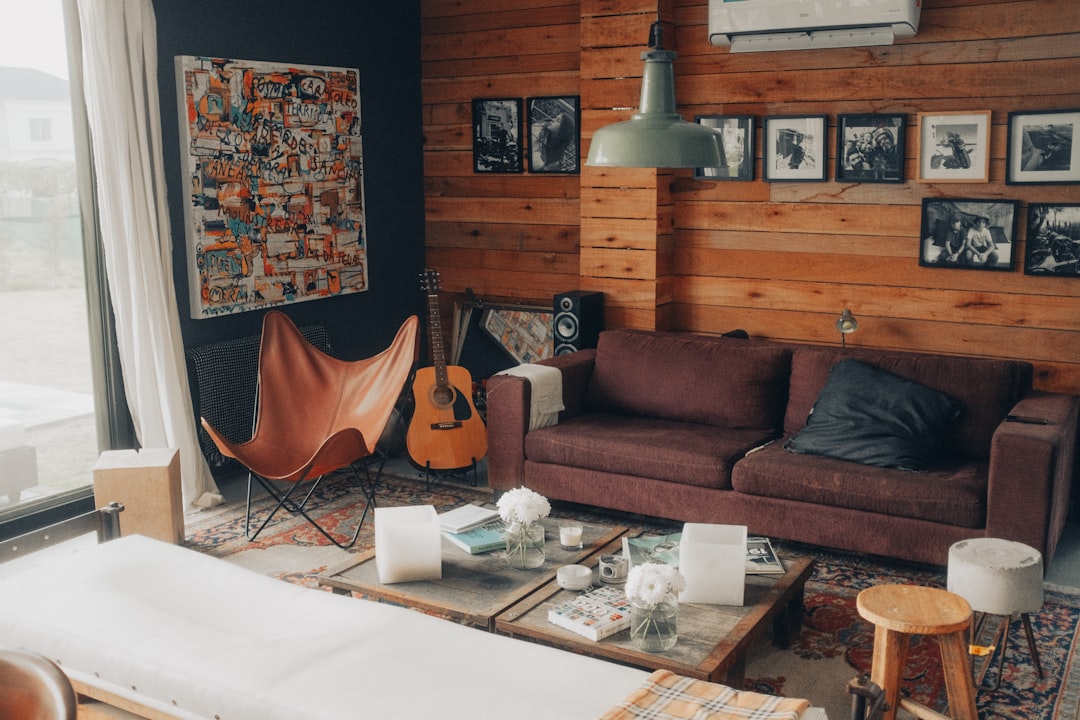
A freestanding 200cm bookshelf on a polished marble floor in a Bukit Timah semi-detached house feels solid enough—until a child pulls on a bottom drawer, and the entire unit shifts forward with a shudder. In Singapore’s compact living spaces, the tipping hazard of a tall storage piece isn’t just about earthquakes; it’s about daily life in tight quarters. The physics are unforgiving: a high centre of gravity, a shallow depth, and a floor plan where that unit is often placed directly opposite a balcony door or along a primary walkway.
Local incident reports, though not systematically collated, often cite the same scenarios—a top-heavy shelf in a 4-room BTO living room under 16 sqm, bumped during festive cleaning, or a unit facing a condo balcony where crosswinds can catch an open door and provide the final nudge. The national standard SS 588:2013 for furniture stability provides the technical framework, specifying tests for forward and rear stability that many imported units simply aren’t designed to pass. For homeowners, this translates to a simple rule: anchoring is non-negotiable.
The risk profile varies by housing type, but the solution doesn’t. In an HDB, the concrete walls offer a secure anchor point, but the limited floor area often forces furniture into precarious, traffic-heavy positions. Condo layouts with balcony-facing placements introduce wind load and the temptation to use the shelf as a room divider, which maximises its exposure to bumps. Landed properties with ubiquitous marble or polished ceramic tiles offer a dangerously low coefficient of friction; a unit that would stay put on HDB homogeneous tiles can slide and then topple on a slick surface.
Proper anchoring involves more than just a screw into plaster. It requires finding the solid timber or concrete frame within the drywall, using appropriate masonry anchors, and securing the unit at its top rear into a structural stud. For renters, this presents a negotiation with landlords, but temporary wall anchors or wide, low-profile anti-tip straps that fit behind the unit are viable compromises. The goal is to eliminate the pivot point entirely, transforming a top-heavy object into an integrated part of the room’s structure—because in a space where every square metre is accounted for, a falling bookshelf isn’t just a damaged item; it’s a genuine safety event.
Always place the heaviest items, like encyclopedias or storage bins, on the lower shelves. This lowers the center of gravity, making the unit more stable. Avoid concentrating significant weight on the very top shelves. Proper loading is a fundamental step in reducing tip-over risk.
Attach a solid wood board along the bottom front edge of the bookshelf. This board acts as a physical barrier, preventing the unit from pivoting forward. It also helps distribute weight slightly forward, increasing stability. Ensure it is securely screwed into the base frame.
Locate the solid wood wall studs behind the drywall using a stud finder. Secure a metal anti-tip bracket to the stud with long, sturdy screws. Then, attach the other part of the bracket firmly to the top or side of the bookshelf's frame. This creates a permanent, load-bearing connection that prevents forward tipping.
Select heavy-duty furniture safety straps designed for large units. Attach one end to the back of the bookshelf's top section and the other to a secure wall anchor. Ensure the strap is pulled taut to eliminate slack. This provides a flexible but strong restraint against accidental pulls or shakes.
A bookshelf that warps after a single monsoon season is a common, costly mistake in Singapore’s 80% humidity. Particleboard or MDF shelves, even with laminate, will eventually swell along the bottom edges where moisture pools; that’s why solid rubberwood or teak, or marine-grade plywood with a sealed veneer, aren’t just aesthetic choices but structural necessities for a long-term investment. This material decision directly impacts weight—a full-height unit in solid wood can easily exceed 100kg once loaded, a critical factor for both delivery and floor loading in older HDB blocks.
Footprint is the next practical hurdle. In a typical 4-room BTO layout, the living room wall between the main door and corridor might only span 3.5 metres, a standard HDB corridor length that dictates maximum furniture length unless you want to block a doorway or window. Condominium feature walls, often framed with bulkheads or alongside full-height windows, present a different challenge: you’re measuring for visual proportion as much as physical fit, ensuring a tall unit doesn’t dwarf the adjacent balcony view or feel crammed under a low ceiling beam.
Scale it to the room’s other fixtures, starting with Singapore’s bed sizing conventions. If your bookshelf is intended for a living area open to a study nook or adjacent to a bedroom pass-through, its depth and height should relate to a standard queen-size bed frame (152cm x 190cm) or a common 180cm-wide TV console. A unit that’s too deep, say over 45cm, will encroach awkwardly into walking paths in spaces under 12 sqm; one that’s too tall, above 200cm, can make a 2.6m ceiling feel oppressively low.
Weight distribution matters just as much as total mass. A top-heavy design with closed cabinets at the bottom and open shelves up top becomes a tipping hazard, especially in households with young children—anchoring to the wall isn’t just advised, it’s often non-negotiable for safety. Consider the load-bearing capacity of your floor type, too; a landed property’s reinforced concrete slab handles weight differently than a HDB’s pre-cast plank system, which may factor into your choice between a monolithic statement piece or two modular units.
Finally, don’t just measure the empty space. Use painter’s tape to mark the exact footprint on your floor, live with it for a day, and walk your usual routes around it. That’s the best way to judge if a 120cm-wide shelf leaves enough room for the robot vacuum to pass or if you’ll constantly be shimmying sideways between it and your sofa arm.
Dovetail joinery is a quiet signal of quality in a bookshelf's carcase. You'll spot it in the corners of drawers, where interlocking wooden fingers create a robust mechanical bond without relying solely on glue. In a humid Singapore living room, this joint resists the warping and gapping that plagues simpler butt joints. It's a detail that suggests the maker considered longevity, not just assembly speed. While it's more common in solid wood pieces, some engineered wood products use a modified version. The presence of dovetails typically indicates a higher grade of construction overall.
Kiln-dried timber is non-negotiable for stability here. Wood arrives from mills with a high moisture content, and if it's not properly dried before construction, it'll warp and crack in our climate. Proper kiln-drying brings the moisture content down to a level that's in equilibrium with Singapore's ambient humidity, around 11-14%. This process prevents the dramatic seasonal movement that can twist shelves or pop joints open. It's a behind-the-scenes step you can't visually inspect, so you must rely on the manufacturer's specification. Skipping it is a false economy for a piece meant to last a decade.
Powder-coated steel brackets are the workhorses of secure anchoring. The coating is a dry powder electrostatically applied and then cured under heat, forming a skin that's far more resistant to chipping and rust than standard paint. This matters because the bracket is under constant tension, and any corrosion weakens its integrity over years. You'll find the finish feels smooth and even, not brittle or tacky. For brackets that might be slightly visible, it also offers a cleaner, more consistent colour. It's a small component where the material grade directly impacts safety.
Laminated chipboard with swollen edges is the telltale sign of a product that won't survive a humid storage room or even a steamy day with the windows closed. The swelling occurs when water vapour penetrates the unprotected particleboard core, causing it to expand and break the laminate seal. Once that laminate lip peels up, it collects dust and can't be repaired cleanly. This is especially common in cheaper, flat-pack furniture where edges aren't properly sealed with PVC or ABS trim. In a tall, loaded bookshelf, compromised substrate integrity is a structural red flag.
Anti-tip hardware must match your wall type. For solid concrete or brick walls—standard in HDB and condo bedrooms—you need high-grade steel anchors, often sleeve anchors or concrete screws, that can handle the immense shear force. For partition walls or drywall, you'll require specialised hollow-wall anchors like toggle bolts that spread the load behind the plasterboard. Using a concrete anchor in a partition wall will crumble the material, while a hollow-wall anchor in concrete will simply bend and fail. The kit that comes with the furniture is often generic; assessing your own walls and upgrading the fasteners is a critical final step.
The top shelf of a display cabinet often ends up holding that heavy ceramic vase from a relative, a few hardcover art books, and maybe a decorative bowl—it’s a recipe for a front-heavy unit. That’s fine until you add the weight of doors and shelves below, which shifts the centre of gravity upwards and outwards, turning a stable piece into a potential hazard. Many buyers assume a bookshelf’s own weight, especially when filled with books, provides enough ballast to prevent tipping; in a landed property with active pets or young children, that assumption is a gamble you don’t want to take. Ignoring the wall material is the other critical error. Using standard plastic wall plugs meant for plasterboard in a hollow partition wall is common, but they offer almost no real grip in HDB drywall or older condo partitions. Conversely, drilling into reinforced concrete without the correct masonry bit and anchor can leave a hole that’s too large for the fastener to bite properly. The anchor must match the substrate—it’s not a one-size-fits-all situation. Formal restraint means using a proper anti-tip kit, typically a metal bracket screwed into the cabinet’s top rear frame and then securely anchored into a wall stud or solid concrete. Relying on the friction of a rug or hoping the unit is “heavy enough” isn’t a safety strategy; it’s an oversight. In many 4-room BTO layouts where the living room doubles as a play area, that oversight becomes a visible risk every day. The process isn’t complex, but it requires the right tools and a few minutes of forethought. Locate the studs with a detector, use anchors rated for the load and your wall type, and ensure the bracket is installed at the correct height. It’s a small task that anchors not just furniture, but peace of mind. For those selecting new storage pieces, considering their mounting needs from the outset is prudent; you can browse options designed for versatile placement in
the living room collection.
A bookshelf that stands perfectly level in the warehouse will often have a subtle, unsettling wobble on the uneven floors of a 1980s HDB flat. You can't gauge that from a product image, and you certainly won't know it until you're trying to steady it with one hand while a child tugs on the other. That's the core argument for a physical inspection, and it's why showroom visits remain critical — especially for substantial storage pieces where stability is non-negotiable. The lighting in Singapore's living rooms, a mix of harsh afternoon sun and cool LED downlights, reveals finishes in ways a calibrated studio shot never will. A laminate that looks like warm oak online can skew orange under your specific corridor light; a matte paint might show every fingerprint. At a showroom, you can see how the material behaves from multiple angles, checking for the colour consistency and sheen you actually want to live with for a decade. For buyers in compact spaces, like those outfitting a 12 sqm study area within an open-concept living room, the ability to assess proportions is invaluable. Megafurniture's living room collection includes anchored, wall-mounted designs that are specifically suited for these tighter zones, offering storage without consuming precious floor space. Seeing a unit in person lets you judge its true bulk and visual weight against a tape-measure guess, ensuring it integrates rather than overwhelms. It’s about mitigating post-delivery surprises. You’ll know if the drawer glide feels flimsy or if the back panel is thinner than expected. A short trip to Joo Seng or Tampines turns abstract dimensions and material descriptions into tangible reality, letting you test the wobble and scrutinise the finish under familiar lighting conditions before committing. For a major investment like a living room refresh, that confidence is worth the journey. You can explore their anchored storage solutions within the broader
living room furniture collectiononline, but the final validation happens in person.
The delivery crew will measure your lift first. They’ll have a tape, but for a tall bookshelf, you should already know the numbers: HDB lifts are typically 1.5m wide by 2.1m deep, with a door opening around 0.8m to 0.9m. For a landed home with a spiral staircase, clearance is the real hurdle—a 2.4m tall unit might fit on paper, but navigating that final turn often requires professional disassembly on the spot.
That’s why professional assembly isn’t just about following a diagram; it should include wall anchoring as a standard service. In a humid climate, the warranty fine print matters just as much. Check if it explicitly covers hardware corrosion on the mounting brackets and fasteners, not just the shelving panels themselves; a bookshelf is only as stable as the metal holding it to the wall.
For BTO owners, the timeline is a delicate dance with your renovation contractor. Delivery for a custom piece can take 8 to 12 weeks, so you’ll need to slot that date between your carpentry completion and before your flooring gets its final polish. It’s a common misstep to have a beautiful new bookshelf arrive while the walls are still being skim-coated.
Coordinate the assembly for the week after your electrician has installed the living room’s ambient lighting, giving the crew clear visibility to secure the unit properly. A rushed job in a half-finished room often leads to a shelf that isn’t perfectly plumb, and that’s a flaw you’ll notice every day.
The most common anxiety about a tall bookshelf in a Singapore home isn't about what to put on it, but whether it'll stay upright. You'll find the same four practical questions popping up on renovation forums and in contractor chats, all circling installation and safety.
How do I secure this to an HDB false wall? You don't. False walls, typically built from plasterboard or lightweight blocks, aren't structural. The only safe method is to locate the solid RC wall behind it—your contractor will need to cut an access panel—and bolt a heavy-duty steel French cleat directly into that. It's a weekend project for a handyman, costing around $80 to $150.
What's the best anchor for condo drywall? For concrete walls with a thin plaster skim, a standard wall plug and screw often suffice. For genuine drywall partitions, you need specialised hollow-wall anchors. Toggle bolts are the traditional choice, but for heavier loads, consider metal snap-toggle anchors; they distribute weight across a broader area inside the wall cavity, which is crucial for a loaded shelf.
Are there weight limits for adjustable shelves? Always. The limit isn't just about the shelf board sagging—it's about the shelf pins or clips shearing off. Particleboard shelves in a 90cm-wide unit might only handle 15kg before bowing becomes visible. A good rule is to treat them for display, not for dense book storage; for that, you want fixed shelves with proper dado joints or reinforced brackets.
Will it damage my vinyl plank flooring? It shouldn't, if it's installed correctly. The real risk comes from dragging a fully loaded unit across the floor, which can gouge or separate the planks. Always lift it into place. For extra protection on softer vinyl finishes, you can fit self-adhesive felt pads to the base of the cabinet, though that can compromise stability—proper levelling feet are a better, if more involved, solution.
The last stretch before a bookshelf arrives is often where the most practical oversights happen. You’ve picked the finish, you’ve liked the style, but a few final checks can mean the difference between a perfect fit and a logistical headache.
Start with the space you’ve actually got. In a high-floor condominium with a ceiling fan, measure the clearance from your intended spot to the fan blades—a 210cm tall unit might look fine on paper until it interferes with the downdraft. For HDB walls, especially in older flats, ensure you’ve acquired the appropriate wall plugs and brackets for securing the unit; plasterboard anchors won’t hold in a hollow partition, and concrete needs a specific plug type. It’s also wise to confirm the showroom unit’s back panel construction; a flimsy hardboard back on a tall shelf won’t provide the sheer strength needed for proper anti-tip anchoring to the wall.
Your floor plan dictates the final form. For a narrow corridor in a 4-room BTO, where every centimetre of walkway matters, a low-profile depth around 30cm might be the only workable solution—it holds books and decor without becoming an obstacle. Conversely, a landed property study or a generous condo living room can often accommodate a full-height, deeper storage unit that functions as a room divider or a library wall, swallowing board games and document boxes behind closed doors.
That final decision often comes down to a simple trade-off. The low-profile shelf offers clearance and a lighter visual weight, which is a godsend in compact spaces. The full-height unit provides substantial, organised storage that many growing households genuinely need. There’s no universal winner, only what fits your specific room and routine.